How to Fix a Leak Under the Kitchen Sink? A Comprehensive Guide
A leaking kitchen sink can cause significant inconvenience and damage to your cabinets or floors if left unchecked. Common causes include loose connections, worn-out seals, or damaged pipes. Fortunately, you can fix a leak under the kitchen sink with a few basic tools and some know-how.
This comprehensive guide will walk you through identifying the cause of the leak, making repairs, and preventing future problems.
Table of Contents
Common Causes of Kitchen Sink Leaks
Understanding the root cause of a leak is the first step to fixing it effectively.
1. Faulty Connections: Loose or misaligned fittings between pipes can allow water to seep through.
2. Worn-Out Seals or Washers: Over time, seals, O-rings, and gaskets degrade, leading to leaks.
3. Cracked Pipes or Components: Damage to pipes, hoses, or the sink basin itself can result in persistent leaks.
By pinpointing the cause, you can choose the right repair method.
Also read: How to Insulate Under the Kitchen Sink?
Types of Kitchen Sink Leaks
Kitchen sink leaks typically occur in one of these areas:
1. Faucet Leaks:
- Water drips from the faucet base, handle, or spout due to worn-out seals or loose fittings.
2. Drain Leaks:
- Leaks occur around the sink’s drain assembly, often caused by improper sealing or corrosion.
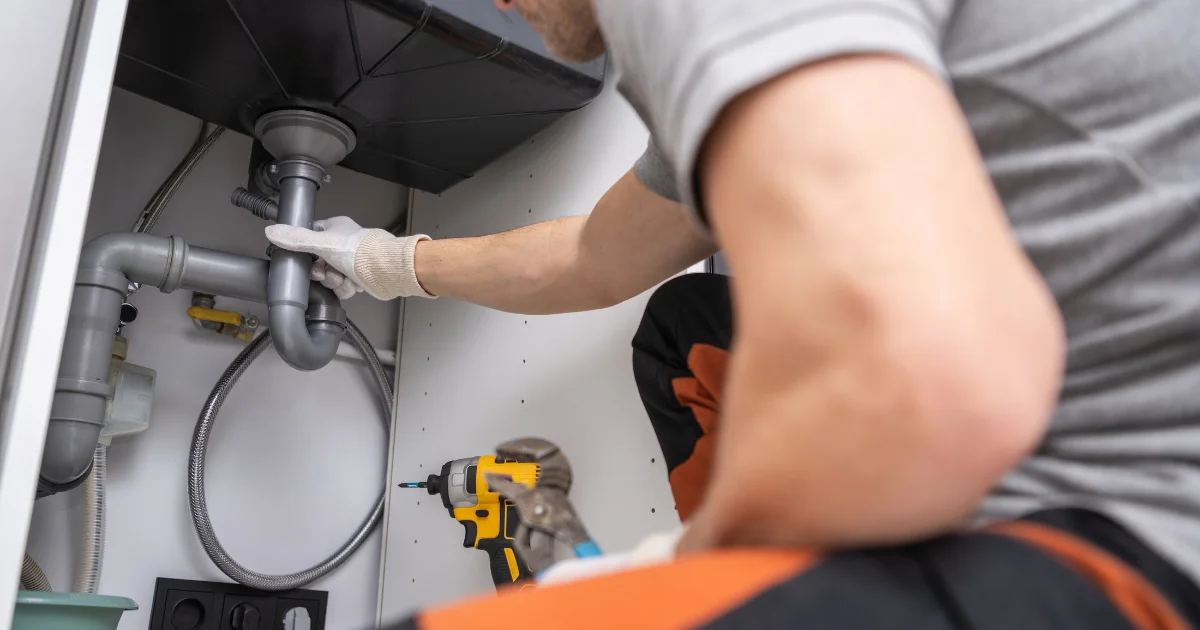
3. Pipe and P-Trap Leaks:
- Pipes under the sink, including the P-trap, can develop cracks or loose connections, resulting in leaks.
Signs and Symptoms of a Kitchen Sink Leak
Not all leaks are immediately visible. Here are some signs to watch for:
- Visible Water Pooling: Puddles of water under the sink or around the faucet are clear indicators of a leak.
- Increased Water Bills: A sudden spike in water usage may suggest a hidden leak.
- Mold or Mildew Growth: Persistent moisture encourages mold and mildew, which can spread quickly.
- Warped Cabinetry or Floors: Water damage to the sink cabinet or surrounding floor is often a sign of prolonged leaks.
Tools and Materials Needed for Repairs
Before you start, gather these essential tools and materials:
Tools:
- Adjustable wrench.
- Pliers.
- Screwdrivers (both flathead and Phillips).
- Bucket for catching water.
Materials:
- Plumber’s tape.
- Replacement washers or seals.
- Pipe sealant or silicone caulk.
- Spare pipes or connectors, if needed.
Having everything on hand will save time and ensure a smoother repair process.
Step-by-Step Guide

Step 1: Identify the Source of the Leak
The first step is to locate where the water is coming from.
Inspection Tips:
- Look for Drips: Use a flashlight to check for visible drips along pipes, connections, and the sink base.
- Feel for Moisture: Run your hand along the pipes to detect damp spots.
- Check the Drain: Pay close attention to the P-trap, a common site for leaks.
Mark any potential problem areas for further inspection.
Step 2: Turn Off the Water Supply
Before making repairs, shut off the water to prevent further leakage.
How to Turn Off the Water:
- Locate the shut-off valves under the sink.
- Turn the valves clockwise to close them.
- Open the faucet to release any remaining water in the pipes.
This step ensures a safe and dry working area.
Step 3: Fixing Common Leak Issues
Different types of leaks require different solutions. Here’s how to address the most common problems:
Fixing Loose Connections
- Use a wrench to gently tighten any loose fittings.
- Wrap the plumber’s tape around threaded connections to create a watertight seal.
- Reconnect the pipes and test for leaks.
Avoid over-tightening, as this can damage the fittings.
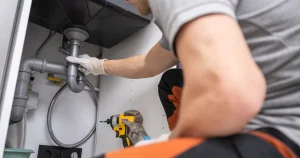
Repairing a Leaking P-Trap
- Unscrew the P-trap (the curved section of pipe under the sink).
- Inspect for cracks, clogs, or worn-out washers.
- Clean the trap and replace any damaged components.
- Reassemble the P-trap and check for leaks.
P-traps often develop leaks due to wear or misalignment.
Addressing Faucet Base or Sprayer Leaks
- Remove the faucet handle and base to access the internal components.
- Replace worn-out gaskets or O-rings.
- Reassemble the faucet and ensure all screws are tight.
Leaking faucet bases are typically caused by degraded seals.
Step 4: Replacing Damaged Parts
If inspection reveals cracked pipes or components, replacement is necessary.
How to Replace Pipes or Connectors:
- Measure the damaged part to ensure an exact match.
- Remove the old component using a wrench or pliers.
- Install the new piece, using plumber’s tape to seal threaded connections.
- Tighten fittings securely without over-tightening.
Replacements are a permanent fix for worn-out or broken parts.
Step 5: Apply Sealant or Plumber’s Tape
For minor leaks at joints or connections, sealant can provide an effective solution.
Using Sealant:
- Apply a thin layer of pipe sealant or silicone caulk to the joint.
- Smooth it out evenly for a clean finish.
- Allow the sealant to cure for the recommended time before testing.
Sealants are especially useful for older plumbing systems.
Step 6: Test the Repair
After completing repairs, turn the water supply back on to check for leaks.
Testing Tips:
- Run both hot and cold water through the faucet.
- Observe the repaired areas closely for any signs of dripping or moisture.
- Tighten connections or reapply sealant if necessary.
Ensure the repair is secure and the leak is fully resolved.
Preventing Future Leaks
Regular maintenance can help you avoid future plumbing issues:
- Inspect Connections: Check pipes and fittings monthly for signs of wear.
- Avoid Overloading the Sink: Heavy items can strain the sink basin and plumbing.
- Flush Drains Regularly: Prevent clogs that can lead to leaks by flushing with boiling water and vinegar.
Proactive care extends the lifespan of your plumbing.
Temporary Fixes for Emergency Leaks
For quick fixes while waiting for permanent repairs:
- Plumber’s Tape: Wrap tape around threaded connections to seal minor leaks temporarily.
- Epoxy Putty: Apply putty to cracks or holes for a quick, watertight patch.
These solutions buy you time until more comprehensive repairs can be made.
Long-Term Solutions for Persistent Leaks
If leaks recur or worsen, consider these measures:
- Replace Worn Components: Install new washers, O-rings, or drain assemblies.
- Upgrade Plumbing Fixtures: Modern fixtures are often more durable and less prone to leaks.
Long-term solutions save money and prevent repeated issues.
DIY vs. Hiring a Professional
Some leaks are easy to fix on your own, while others may require professional assistance.
When DIY Is Sufficient:
- Small leaks from loose connections or minor clogs.
- Replacing washers, seals, or simple components.
When to Call a Plumber:
- Persistent leaks despite multiple repairs.
- Significant water damage or mold growth.
- Complex issues involving multiple plumbing systems.
A plumber’s expertise can save time and prevent further damage.
Signs of a Serious Plumbing Issue
If you notice any of these signs, the leak may indicate a more serious problem:
- Persistent Leaks: Water continues to drip despite repairs.
- Water Damage: Stains, warping, or mold near the sink area.
- High Water Bills: Unexplained increases in water usage.
Address these issues promptly to avoid costly repairs.
Emergency Tips for Managing Severe Leaks
If a major leak occurs, take these steps to minimize damage:
- Turn Off the Main Water Supply: Prevent further flooding by shutting off the main valve.
- Contain the Leak: Use buckets, towels, or plastic sheeting to catch water.
- Call a Professional: Contact a plumber for urgent assistance.
Acting quickly can prevent water damage and protect your home.
Common Mistakes to Avoid
- Over-Tightening Connections: This can strip threads and cause additional leaks.
- Using the Wrong Tools: Improper tools may damage pipes or fittings.
- Ignoring Underlying Issues: Temporary fixes won’t solve persistent problems.
Taking the right approach ensures a durable and effective repair.
Conclusion
Fixing a leak under the kitchen sink doesn’t have to be daunting. By identifying the source and following these steps, you can address the issue promptly and avoid costly repairs. Regular maintenance and inspections can also help prevent leaks in the future, keeping your kitchen dry and damage-free.
FAQs
What causes most leaks under the kitchen sink?
The most common causes include loose connections, worn-out seals, and clogged or damaged pipes.
Can I fix a leak without professional tools?
Yes, many leaks can be repaired with basic tools like a wrench and plumber’s tape.
How do I know if the P-trap is the issue?
Check for moisture or dripping around the curved pipe beneath the sink. A clogged or misaligned P-trap is often the culprit.
Is it safe to use sealant on all types of pipes?
Sealant is safe for most pipe joints but avoid overusing it or applying it to non-threaded connections.
How often should I check for leaks under my sink?
Inspect your plumbing monthly to catch potential issues early.
What should I do if the leak persists after repairs?
If the leak continues, consult a professional plumber to diagnose and address the underlying issue.


Post Comment