The Ultimate Guide to Outdoor Kitchen Sinks: A Buyer’s Guide
Outdoor kitchens have become a popular addition to homes, offering a perfect space for entertaining and cooking in the fresh air. Among the key elements of an outdoor kitchen is the outdoor kitchen sink. While it may seem like a simple addition, selecting the right sink can significantly enhance the functionality, convenience, and aesthetic appeal of your outdoor space.
In this ultimate guide, we’ll cover everything you need to know to choose the perfect outdoor kitchen sink, from materials and installation options to essential features and maintenance tips.
Table of Contents
Why Do You Need an Outdoor Kitchen Sink?
An outdoor kitchen sink is more than just a luxury—it’s a practical necessity for serious outdoor cooks and entertainers. Here’s why:
- Convenience: Wash your hands, rinse vegetables, or clean up dishes without having to run indoors.
- Hygiene: Keeps your cooking area clean and organized, reducing cross-contamination.
- Efficiency: Saves time and effort by providing water access where you need it most.
- Aesthetics: Enhances the overall design and functionality of your outdoor kitchen.
Also read: Ultimate Outdoor Kitchen Pergolas
Key Considerations Before Buying
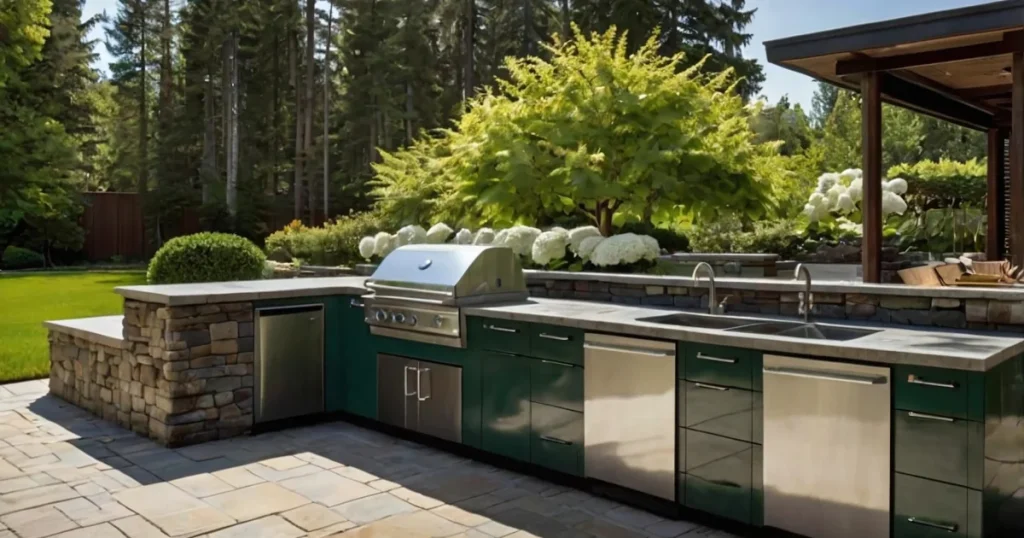
An outdoor kitchen sink is a practical addition, but choosing the right one requires careful planning. Consider these factors to ensure your sink meets your needs and complements your outdoor kitchen.
1. Purpose and Usage
- Primary Use: Determine whether it will be used for food prep, cleaning, or both.
- Frequency of Use: Choose materials and features based on how often the sink will be in operation.
- Entertaining Needs: Opt for larger or dual-basin sinks if you frequently host gatherings.
2. Location and Plumbing Access
- Water Supply: Ensure access to a reliable water line for hot and cold water.
- Drainage: Plan for proper drainage to prevent pooling or plumbing issues.
- Proximity to Other Features: Place the sink near the grill or prep station for efficiency.
3. Material Durability
- Weather Resistance: Choose materials like stainless steel, granite composite, or concrete that withstand outdoor elements.
- Rust and Corrosion Resistance: Opt for sinks with protective coatings if exposed to moisture.
- Scratch and Stain Resistance: Important for heavy-duty use or high-traffic areas.
4. Sink Size and Configuration
- Available Space: Measure your outdoor kitchen area to find the right fit.
- Single vs. Double Basin: Choose based on the tasks you’ll perform most often.
- Depth: Deeper sinks are ideal for cleaning large items but may require more water supply.
5. Maintenance Requirements
- Ease of Cleaning: Smooth, non-porous surfaces are easier to clean.
- Sealant Needs: Stone or concrete sinks may require periodic sealing for protection.
- Faucet Maintenance: Select durable, easy-to-maintain faucets to match the sink.
6. Style and Aesthetic Fit
- Kitchen Theme: Match the sink style and finish with your outdoor kitchen’s design.
- Finish Options: Polished, brushed, or matte finishes can influence the overall look.
- Integrated Features: Consider sinks with built-in drainboards, cutting boards, or soap dispensers for added style and function.
7. Budget
- Initial Cost: Balance your budget with the durability and features you need.
- Long-Term Investment: Invest in high-quality materials to save on repairs or replacements later.
- Additional Costs: Account for installation, plumbing, and any accessories.
8. Climate Considerations
- Freezing Temperatures: Opt for sinks and pipes designed to handle extreme weather conditions.
- UV Exposure: Look for UV-resistant materials to prevent fading or discoloration.
- Rain and Moisture: Ensure the sink has proper drainage and protective coatings.
9. Installation Type
- Undermount vs. Drop-In: Choose the style that fits your countertop and aesthetic preference.
- DIY vs. Professional Installation: Determine whether you can install it yourself or need expert help.
- Portable Options: Consider a movable sink station if you prefer flexibility.
Pro Tip: Before making a purchase, sketch your outdoor kitchen layout to visualize the sink’s placement and functionality.
By considering these key factors, you’ll choose an outdoor kitchen sink that not only meets your practical needs but also enhances your outdoor living experience!
Types of Outdoor Kitchen Sinks
There are various types of outdoor kitchen sinks to suit different needs and styles:
1. Drop-In Sinks
- Installed by placing the sink into a pre-cut countertop hole.
- Easy to install and a popular choice for outdoor kitchens.
2. Undermount Sinks
- Mounted beneath the countertop for a seamless, modern look.
- Easier to clean but requires professional installation.
3. Farmhouse Sinks
- Known for their large basin and front apron.
- Perfect for washing large items like grill grates and pots.
4. Prep Sinks
- Compact and designed for food prep rather than cleaning.
- Great as a secondary sink for larger outdoor kitchens.
5. Bar Sinks
- Smaller sinks intended for drink preparation and glass rinsing.
- Often paired with outdoor bar areas.
Best Materials for Outdoor Kitchen Sinks
Durability is crucial for outdoor sinks due to exposure to the elements. Here are the most popular materials:
1. Stainless Steel
- Resistant to rust and corrosion.
- Easy to clean and highly durable.
- Look for marine-grade (316 stainless steel) for maximum longevity.
2. Granite Composite
- Scratch-resistant and heat-resistant.
- Available in a variety of colors and finishes.
- Less prone to fading in direct sunlight.
3. Cast Iron with Enamel Coating
- Classic, durable option with a glossy finish.
- Heavy and may require extra countertop support.
4. Stone
- Natural stone sinks like granite or soapstone are visually stunning.
- Resistant to heat but may require sealing to prevent stains.
5. Ceramic or Porcelain
- Elegant and affordable but less durable in extreme weather conditions.
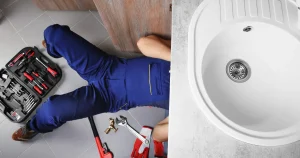
Install an Outdoor Kitchen Sink (Step-by-Step Guide)
An outdoor kitchen sink adds functionality and convenience to your backyard. This guide walks you through the process, whether you’re a DIY enthusiast or working with a contractor.
1. Plan the Location
- Choose a functional spot: Position the sink near your grill or food prep area.
- Check water access: Ensure easy access to water supply and drainage.
- Measure the space: Account for the sink size, countertop, and cabinet dimensions.
2. Gather Your Tools and Materials
Here’s what you’ll need:
- Sink (stainless steel is ideal for outdoor use).
- Faucet and fittings.
- PEX or PVC pipes for water lines.
- Drainpipe and fittings.
- Teflon tape, plumber’s putty, and silicone sealant.
- Adjustable wrench, drill, and jigsaw.
3. Install the Sink Base
- Prepare the countertop: Cut a hole in your countertop matching the sink’s dimensions. Use a jigsaw for precise cuts.
- Secure the sink: Apply plumber’s putty around the edge and drop the sink into the opening.
- Seal the edges: Use silicone to prevent water seepage.
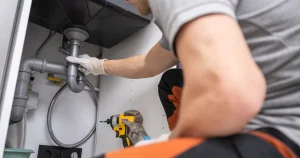
4. Connect the Water Supply
- Attach PEX or PVC pipes: Run pipes from your outdoor water source to the sink location.
- Install shutoff valves: Add valves near the sink for easy maintenance.
- Connect the faucet: Secure it to the sink and attach the water supply lines using Teflon tape to prevent leaks.
5. Set Up the Drainage System
- Connect the drainpipe: Attach a drainpipe under the sink to direct wastewater.
- Plan for gray water: If local codes allow, you can drain into a garden area. Otherwise, connect to your home’s sewage system.
- Seal the connections: Tighten all fittings and test for leaks.
6. Test and Finalize
- Turn on the water: Check for leaks in the supply lines and drain connections.
- Inspect the faucet: Ensure smooth water flow and proper drainage.
- Add finishing touches: Clean the area and ensure all edges are sealed.
Pro Tips for a Seamless Installation
- Go stainless: It’s rust-resistant and durable for outdoor use.
- Insulate pipes: Prevent freezing in colder climates.
- Follow local codes: Check permits or guidelines for water and drainage systems.
Installing an outdoor kitchen sink is a practical upgrade that boosts your backyard’s usability. By following these steps, you’ll have a functional and stylish addition ready in no time.
Troubleshooting Common Installation Issues
Even with careful planning, issues can arise during or after installing your outdoor kitchen sink. Here’s how to troubleshoot and resolve the most common problems.
1. Water Leaks in the Supply Lines
Symptoms: Dripping or pooling water near connections.
Solutions:
- Tighten loose fittings using an adjustable wrench.
- Apply Teflon tape to threads for a secure, watertight seal.
- Check for cracks in the pipes or fittings; replace damaged parts.
Prevention Tip: Use quality PEX or PVC pipes and double-check all connections during installation.
2. Low Water Pressure
Symptoms: Weak or inconsistent water flow from the faucet.
Solutions:
- Inspect the water supply valves to ensure they’re fully open.
- Remove the faucet aerator and clean out debris or mineral buildup.
- Check for kinks in the supply lines and straighten them out.
Prevention Tip: Use high-quality pipes and fittings rated for outdoor use to prevent blockages.
3. Poor Drainage
Symptoms: Water pooling in the sink or slow draining.
Solutions:
- Check the drainpipe for clogs or blockages and clear them.
- Ensure the drain slope is sufficient (1/4 inch per foot) for proper flow.
- Tighten loose connections in the drainage system.
Prevention Tip: Regularly clean the drain and avoid letting food debris go down the sink.
4. Sink Doesn’t Fit Properly in the Countertop
Symptoms: Gaps between the sink and countertop or an unstable sink.
Solutions:
- Recheck the countertop cutout size against the sink dimensions.
- Add a support bracket under the sink for stability.
- Seal gaps with silicone to prevent water seepage.
Prevention Tip: Measure twice before cutting the countertop and use the sink template for precision.
5. Freezing Pipes in Cold Weather
Symptoms: Cracked pipes or no water flow during freezing temperatures.
Solutions:
- Insulate the pipes with foam insulation or heat tape.
- Shut off and drain the water supply before winter if the sink isn’t in use.
- Repair or replace damaged pipes as needed.
Prevention Tip: Plan for winterization during installation by adding shutoff valves and drain points.
6. Faucet Wobbles or Becomes Loose
Symptoms: Faucet shifts or leaks when used.
Solutions:
- Tighten the mounting nut underneath the sink using a basin wrench.
- Check the gasket between the faucet and sink; replace if worn.
- Apply plumber’s putty around the base for added stability.
Prevention Tip: Secure the faucet firmly during installation and inspect it regularly.
7. Gray Water Drainage Issues
Symptoms: Improper drainage or odor near the sink.
Solutions:
- Ensure the drainpipe empties into a proper gray water disposal area.
- Use a P-trap to prevent odors from coming back up the drain.
- Follow local codes for gray water systems.
Prevention Tip: Research drainage requirements before installation and design accordingly.
Pro Tip for Hassle-Free Installation
Create a checklist for each stage of the installation—this helps ensure no detail is overlooked and minimizes the chance of future issues.
By addressing these problems early, you’ll enjoy a seamless outdoor kitchen sink experience with minimal headaches!
How an Outdoor Kitchen Sink Enhances Your Outdoor Living Space
Adding an outdoor kitchen sink isn’t just about convenience—it’s a game-changer for both design and functionality. Here’s how it transforms your outdoor living area into a more efficient, stylish, and enjoyable space.
1. Streamlines Outdoor Cooking
- No more back-and-forth: Wash fruits, vegetables, and dishes right where the action is.
- Hygienic prep area: Keeps raw food juices and cleaning separate from indoor spaces.
- Effortless cleanup: Rinse grilling tools and plates without trekking indoors.
2. Boosts Aesthetic Appeal
- Integrated design: A sleek sink elevates the sophistication of your outdoor kitchen.
- Material versatility: Choose from stainless steel, granite, or concrete to match your style.
- Complements the layout: Whether modern or rustic, a well-placed sink enhances your setup.
3. Increases Functionality
- Multi-tasking hub: Use it for food prep, drink station setups, or cleaning garden tools.
- Host-friendly: Serve guests without interruptions by keeping everything within reach.
- Adaptable designs: Install single-basin sinks for compact spaces or double-basin for versatility.
4. Improves Hygiene Outdoors
- Dedicated water source: Reduces the need to use garden hoses for washing.
- Minimizes clutter: Keeps dirty dishes and utensils out of sight while entertaining.
- Prevents cross-contamination: A clean space helps maintain food safety.
5. Adds Property Value
- Desirable upgrade: Outdoor kitchens with functional features are a top trend in real estate.
- Customizable appeal: Tailor the sink area with cabinets and countertops for a polished look.
- Durable investment: High-quality outdoor sinks withstand weather and maintain their charm.
Pro Tips to Maximize Impact
- Position the sink near the grill or prep station for a seamless workflow.
- Use weather-resistant materials for long-term durability.
- Include decorative elements like backsplashes or under-sink lighting for a luxurious touch.
An outdoor kitchen sink does more than just improve convenience—it transforms your outdoor space into a fully functional, stylish, and enjoyable living area. Whether you’re hosting, cooking, or simply relaxing, it’s an upgrade worth making!
Tips for Choosing the Right Sink Style
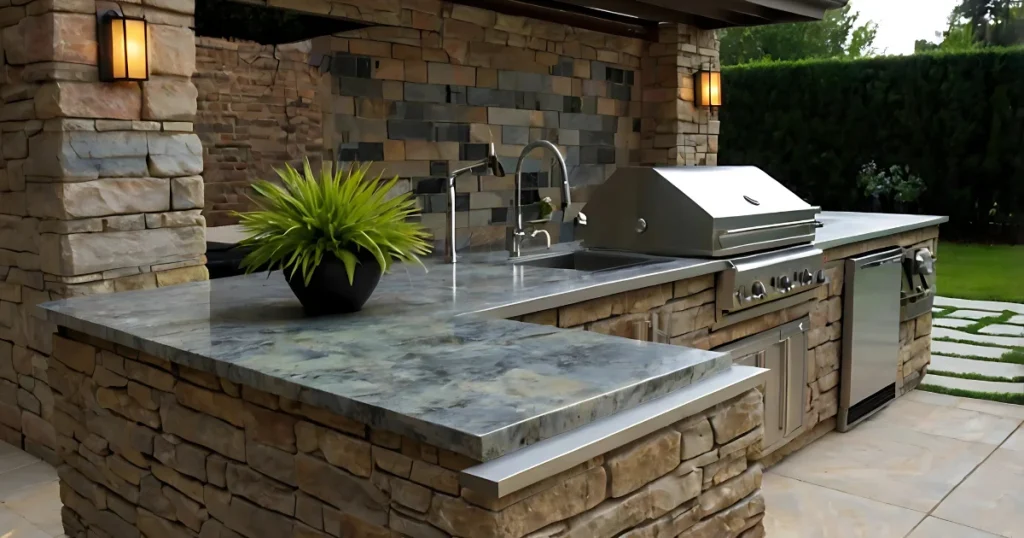
The sink is more than just a functional feature; it’s a design statement. Picking the right style and finish ensures your outdoor kitchen looks cohesive and stunning. Here’s how to make the perfect choice.
1. Match the Sink Style to Your Kitchen Theme
- Modern Kitchens: Opt for sleek, undermount or flush-mount sinks with clean lines.
- Rustic or Farmhouse Kitchens: Choose apron-front sinks or hammered copper styles for charm and warmth.
- Industrial Kitchens: Stainless steel or concrete sinks pair well with exposed materials.
- Coastal or Tropical Kitchens: Consider integrated stone or granite sinks to echo natural elements.
2. Choose a Durable, Weather-Resistant Material
- Stainless Steel: The top choice for durability, rust resistance, and modern aesthetics.
- Granite or Quartz Composite: Adds a luxurious, high-end feel with excellent scratch resistance.
- Copper: Offers a rustic, warm look and natural antibacterial properties but requires maintenance.
- Concrete: Perfect for industrial or minimalist designs; can be custom-shaped.
3. Consider the Finish
- Brushed Stainless Steel: Hides scratches and water spots, ideal for busy outdoor spaces.
- Polished Metal: Shiny and reflective for a modern look, but prone to fingerprints.
- Matte Black: Bold and trendy, complements contemporary or industrial kitchens.
- Natural Stone: Offers unique textures and colors for a premium, organic look.
4. Factor in Functionality with Style
- Single-Basin Sinks: Great for compact spaces and easy cleaning of large items.
- Double-Basin Sinks: Perfect for multitasking—prep on one side, wash on the other.
- Integrated Drainboards: Ideal for keeping the workspace tidy and organized.
5. Think About Maintenance Needs
- Low-Maintenance Options: Stainless steel and composite sinks are easy to clean and maintain.
- High-Maintenance Finishes: Copper and polished metals require regular upkeep to preserve their look.
6. Coordinate with Other Kitchen Features
- Countertops: Match or contrast the sink finish with your countertop material for a balanced look.
- Faucet Style: Pair the sink with a complementary faucet in the same or contrasting finish.
- Cabinetry: Choose a sink finish that blends with or highlights the cabinetry for visual cohesion.
Pro Tips for a Cohesive Look
- Test samples: Bring material and finish samples to your outdoor space to see how they look in natural light.
- Plan for longevity: Prioritize weather-resistant finishes that maintain their beauty over time.
- Stay consistent: Avoid mixing too many finishes; stick to 1–2 to keep the design unified.
The right sink style and finish can elevate your outdoor kitchen, blending practicality with aesthetics. Choose materials and finishes that align with your vision while standing up to the elements!
Maintenance Tips for Outdoor Kitchen Sinks
Keeping your outdoor kitchen sink in top shape ensures it stays functional and looks great for years. Regular maintenance is key, especially since outdoor sinks are exposed to weather, dirt, and debris. Follow these tips to keep your sink in prime condition.
1. Clean Regularly to Prevent Build-Up
- Stainless Steel Sinks: Wipe down with a soft cloth and mild detergent to remove grease and water spots.
- Copper Sinks: Use warm water and a non-abrasive cleaner to preserve the patina or polish to restore shine.
- Composite or Stone Sinks: Clean with a mix of water and dish soap to avoid scratching.
Pro Tip: Avoid harsh cleaners or steel wool, which can damage the surface.
2. Protect Against Rust and Corrosion
- Dry the Sink After Use: Wipe down the surface to prevent standing water.
- Apply a Protective Coating: Use a stainless steel or stone sealant to guard against moisture damage.
- Inspect for Rust Spots: Remove rust using a mixture of baking soda and water or a commercial rust remover.
3. Maintain the Drainage System
- Clear Clogs Regularly: Use a sink strainer to catch debris and flush the drain with hot water weekly.
- Inspect for Leaks: Check the drainpipes and fittings for cracks or looseness.
- Unclog Drains Safely: Use a plumbing snake or natural cleaners (baking soda and vinegar) to clear blockages without damaging pipes.
4. Winterize for Cold Climates
- Shut Off Water Supply: Disconnect and drain water lines before freezing weather sets in.
- Insulate Pipes: Wrap exposed pipes with foam insulation or heat tape to prevent freezing.
- Cover the Sink: Use a weatherproof cover to shield the sink from snow and ice.
5. Protect Against Weather Damage
- Use a Sink Cover: Prevent dirt, debris, and UV exposure when the sink is not in use.
- Choose Weather-Resistant Materials: Stainless steel and composite sinks handle outdoor conditions better than other materials.
- Secure Fixtures: Tighten faucets and fittings periodically to prevent weather-related loosening.
6. Maintain the Faucet
- Remove Hard Water Deposits: Soak the faucet in vinegar to dissolve limescale.
- Lubricate Moving Parts: Apply silicone grease to ensure smooth operation.
- Inspect for Wear and Tear: Replace washers or seals if dripping occurs.
7. Inspect Annually
- Check for Damage: Look for cracks, chips, or rust in the sink and surrounding area.
- Assess Connections: Ensure water supply and drainage pipes are secure and leak-free.
- Reapply Sealant: Reseal edges or apply new protective coatings as needed.
Quick Maintenance Checklist
- Wipe the sink after every use.
- Clear drain debris weekly.
- Inspect pipes and connections monthly.
- Winterize before freezing temperatures.
- Reapply protective coatings annually.
By following these maintenance tips, your outdoor kitchen sink will stay clean, functional, and ready to enhance your outdoor living space for years to come!
Tips for Organizing Your Outdoor Kitchen Sink Area
An organized outdoor kitchen sink area streamlines cooking, cleaning, and entertaining. Here’s how to set up your space for optimal functionality and style.
1. Designate Zones for Tasks
- Prep Zone: Keep cutting boards, knives, and prep bowls near the sink.
- Cleaning Zone: Store sponges, dish soap, and cleaning cloths under the sink.
- Storage Zone: Use cabinets or shelves for dishware, utensils, and grilling tools.
Pro Tip: Arrange items based on how frequently you use them—daily essentials should be within arm’s reach.
2. Install Functional Accessories
- Sink Caddy: Holds sponges, brushes, and soap for quick access.
- Pull-Out Trash Bin: Keeps your workspace tidy and minimizes mess.
- Built-In Drying Rack: Saves counter space and allows dishes to dry directly into the sink.
3. Use Vertical Space
- Wall Hooks: Hang grilling tools, towels, or small pots.
- Floating Shelves: Store spices, condiments, or decorative items.
- Pegboards: A customizable option for arranging utensils and accessories.
4. Optimize Under-Sink Storage
- Stackable Bins: Organize cleaning supplies, trash bags, and extra sponges.
- Pull-Out Drawers: Maximize access to hard-to-reach areas.
- Waterproof Liners: Protect cabinets from water damage and make cleaning easier.
5. Keep the Countertop Clutter-Free
- Dedicated Prep Area: Leave enough space for cutting and mixing.
- Portable Bins: Use bins for items like grilling tools, condiments, or napkins that can be moved when not in use.
- Minimize Decor: Use practical decor like herb planters or functional items to avoid crowding the space.
6. Add Convenience Features
- Soap Dispenser: Built-in dispensers reduce countertop clutter and are easy to refill.
- Hot/Cold Water Faucet: For added versatility, especially in colder climates.
- Lighting: Install task lighting above the sink for nighttime use.
7. Maintain Hygiene
- Use a Sink Cover: Double it as extra counter space when not in use.
- Add a Drain Strainer: Prevent debris from clogging the sink.
- Keep Towels Handy: Use a towel bar or hooks for easy drying.
8. Plan for Easy Cleanup
- Smooth Finishes: Choose countertops and sink materials that are easy to wipe down.
- Accessible Trash Bin: Place it near the sink for effortless cleanup.
- Garden Hose Connection: Keep a hose nearby for quick rinsing of the sink and surrounding area.
Pro Tips for Efficiency
- Group similar items together (e.g., all cleaning supplies in one area).
- Use weather-resistant organizers to handle outdoor exposure.
- Regularly declutter to keep the space functional and inviting.
By organizing your outdoor kitchen sink area strategically, you’ll create a space that’s efficient, tidy, and perfect for entertaining or everyday use!
FAQs
1. Can I install an indoor sink outdoors?
Indoor sinks are not designed to withstand outdoor conditions. Use sinks made from weather-resistant materials for durability.
2. What type of faucet is best for outdoor sinks?
Choose faucets made of stainless steel or brass, as they resist rust and corrosion.
3. How do I protect my outdoor sink from weather damage?
- Use a weatherproof cover.
- Regularly clean and apply protective coatings if necessary.
4. Can I install a hot water connection?
Yes, but it requires a dedicated hot water line or a small water heater.
Conclusion
An outdoor kitchen sink is an essential feature for any outdoor cooking or entertaining space. From enhancing functionality to elevating the aesthetic, the right sink can make all the difference. By considering your needs, exploring material options, and planning installation thoughtfully, you can select a sink that suits your style and stands up to the elements.
Investing in a durable, stylish sink not only makes your outdoor kitchen more convenient but also transforms it into a fully functional and enjoyable space for gatherings.
Ready to upgrade your outdoor kitchen? Start with the perfect sink and let your outdoor culinary adventures begin!


Post Comment